

The Ultimate Dummy’s Guide to Using a Bitcoin Block Explorer
The Bitcoin blockchain is open and public. Great. Fantastic, even. All you need is a good block explorer and you have all the information at your fingertips.
But if you’re a beginner, block explorers can be such a pain to understand. They can look like a chaotic mess of numbers, jargon and data if you don’t know what you’re looking at.
Let’s fix that and get you reading block explorers like a pro, because despite the dense UI, they’re not as complicated as they look.
Block Explorer? Who is She?
A block explorer is a website or tool that lets you search and browse the public transaction data recorded on a blockchain. Think of it as a window that shows you everything happening on the Bitcoin network, in real time.
You can find all sorts of information in there, including:
- Transactions (sender, recipient, amount, fee, timestamp, confirmation status)
- Blocks (height, timestamp, size, included transactions, miner)
- Addresses (balance and full transaction history)
- Network stats (fees, mempool size, hash rate, difficulty)
That’s a lot of power packed into one search bar, so you can understand why most bitcoiners rely on them.
So, which explorer should you use?
Honestly, there’s no shortage of options: Blockchain.com, Blockstream.info, and Mempool.space are all solid picks. For this guide, we’ll be using Mempool.space, one of the cleanest and most beginner-friendly explorers out there.
Pro Tip: Every explorer shows the same data, just laid out differently. Don’t panic if one looks unfamiliar, it’s still the same info underneath.
Okay, But What Am I Looking At?
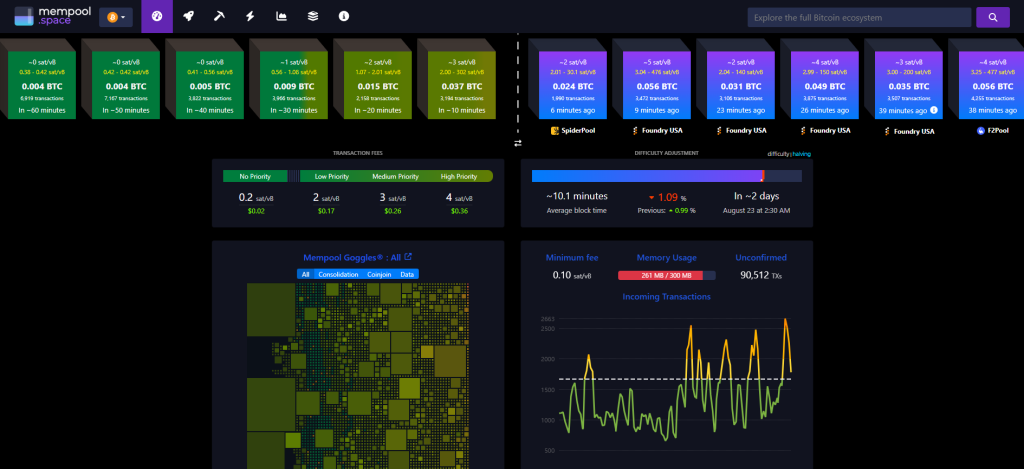
Before we jump into the how-tos, let’s do a quick homepage breakdown.
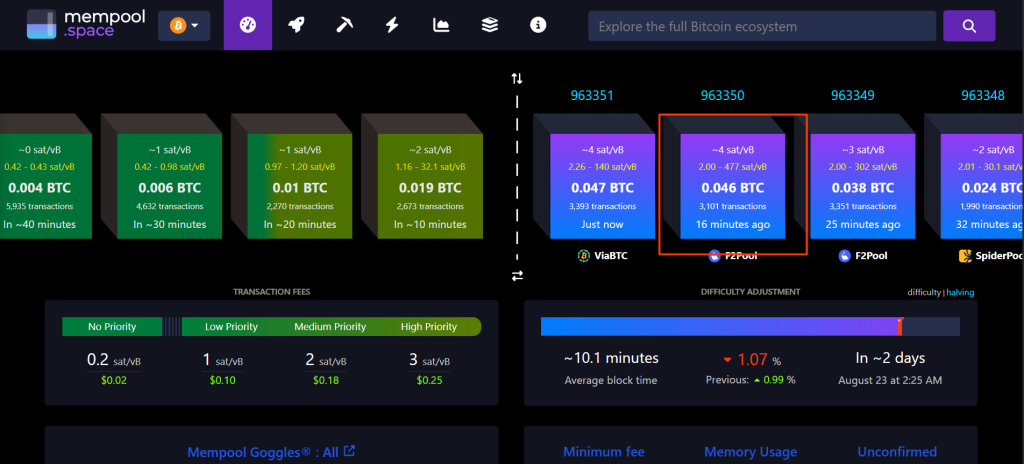
When you land on Mempool.space, you’ll see a search bar at the top, followed by a row of blocks split by a dotted line.
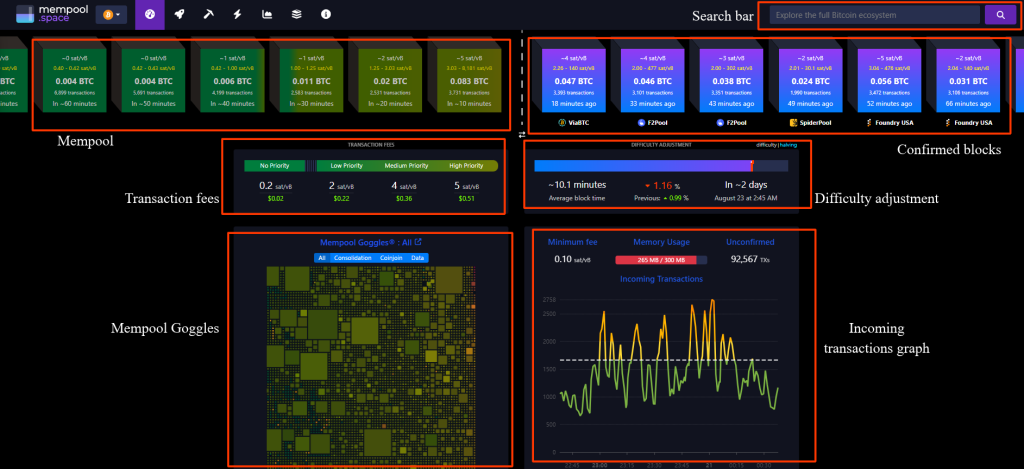
Below that, you’ll see a few boxes side by side: transaction fees on the left and the difficulty adjustment on the right.
Under those, there’s mempool goggles on the left (it’s mostly used by on-chain analysts and researchers so we won’t get into it). On the right, there’s a graph showing a real-time look at how fast new, unconfirmed transactions are flowing into the mempool.
Up next, making sense of all these sections and what most of them do.
Wait, Wait, Wait…
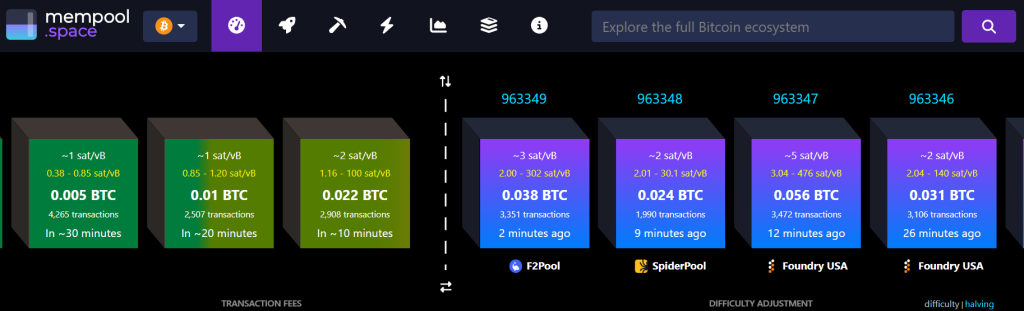
Here’s that row of blocks up close. What you’re looking at on the left is the mempool, Bitcoin’s version of a waiting room, where transactions sit until a miner picks them up. The blocks on the right are already confirmed, meaning they’re locked into the blockchain for good.
Every time a new block gets mined, it’s added to the confirmed side, and the transactions inside are completed.
If there’s a long backlog of unconfirmed blocks on the left, the mempool is busy, and fees tend to climb since everyone’s competing for the same limited block space.
Show Me Transaction Receipts
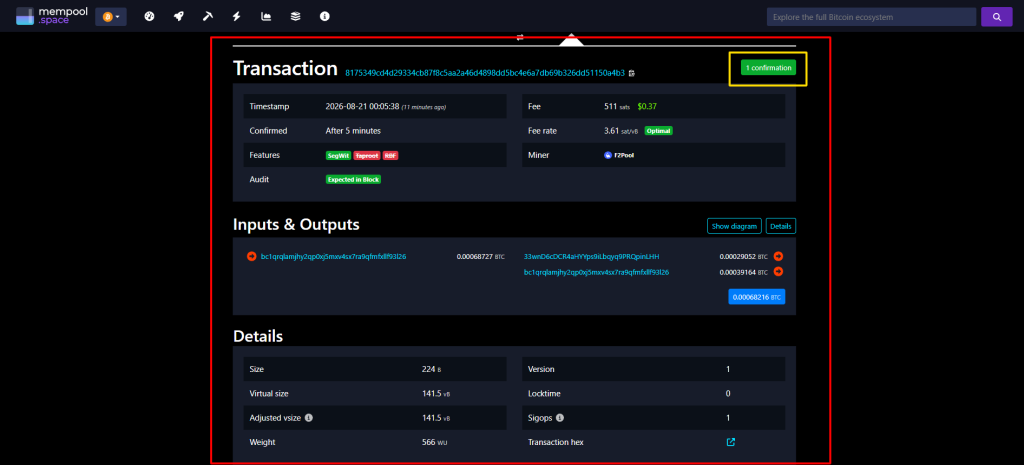
Got a transaction you want to check on? The search bar has all the answers.
You’ll need your transaction ID (TXID), which is a long string of letters and numbers under the transaction’s details in your wallet.
Paste it into the search bar and click enter.

A page with everything about that transaction will pop up. You can see who sent it, who received it, the fee paid, and the timestamp.
Getting Blocked
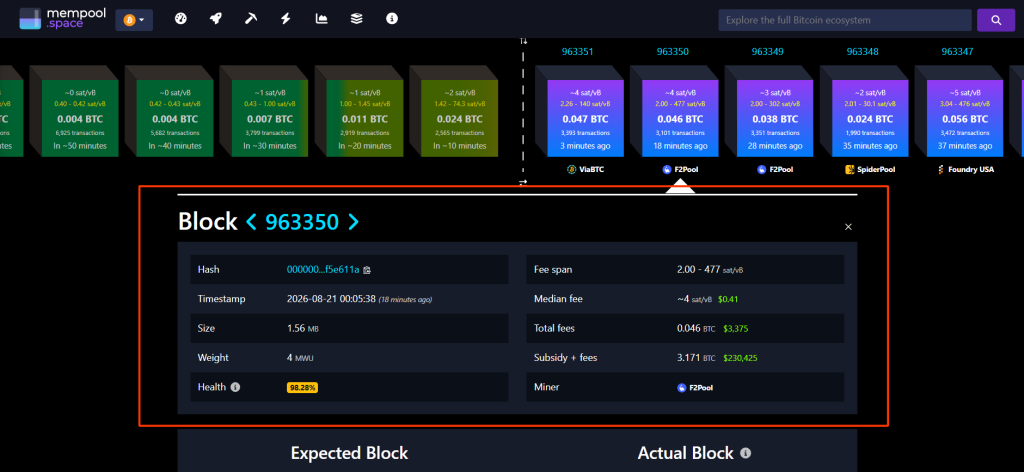
When we took a closer look at the blocks earlier, they had some data written on them. If you’re curious about all the data held in a block, all you need to do is click on it.
You can also use the search bar to look up specific blocks using their numbers, say like the Genesis block ‘0’.
A page will pop up showing everything about that block including its height, timestamp, size, the full list of transactions it contains, and which mining pool found it.
Stalking Is Allowed
If your curiosity extends into other people’s business, then a block explorer is definitely the tool for you.
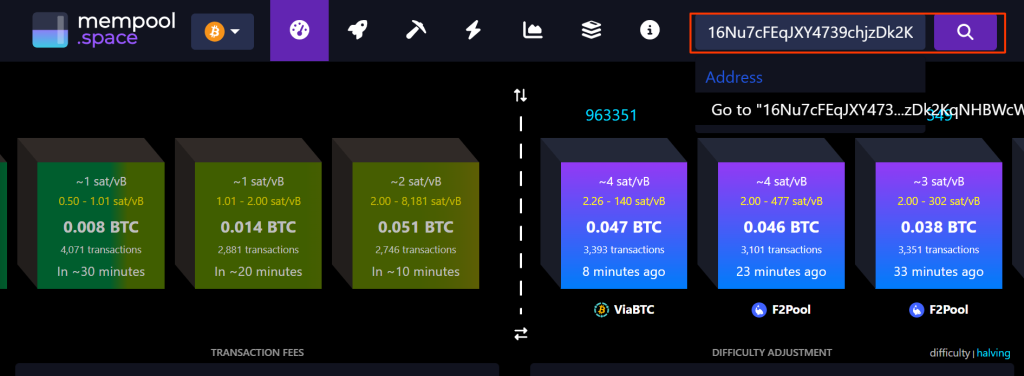
Grab their public address, the long string of letters and numbers they share to receive Bitcoin, and paste it into the search bar.
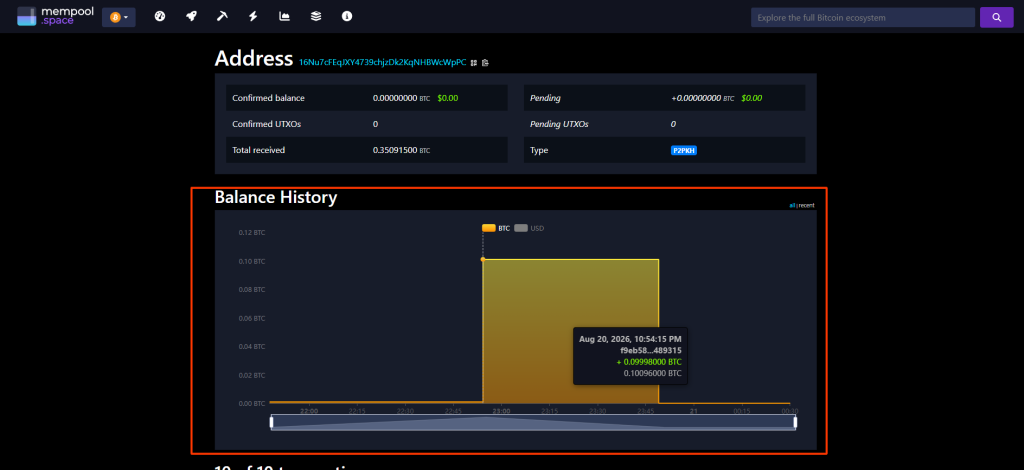
A page will pop up showing that address’s current balance, along with every transaction it’s ever sent or received. You can take your curiosity further and click into any of the transactions for the full details.
Your Fee-lings Count
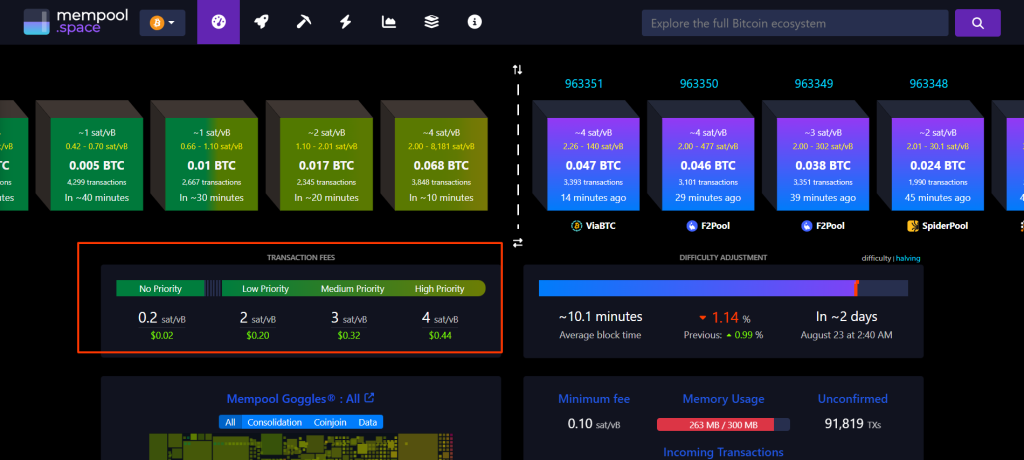
The transaction fees and difficulty adjustment sections on the homepage answer two very different questions: what’s this gonna cost me, and how’s the network holding up?
On the left, you’ll see suggested fees, usually split into speeds like low, medium, and high. These tell you roughly how much to pay depending on how fast you want your transaction confirmed, the busier the mempool, the higher these numbers climb.
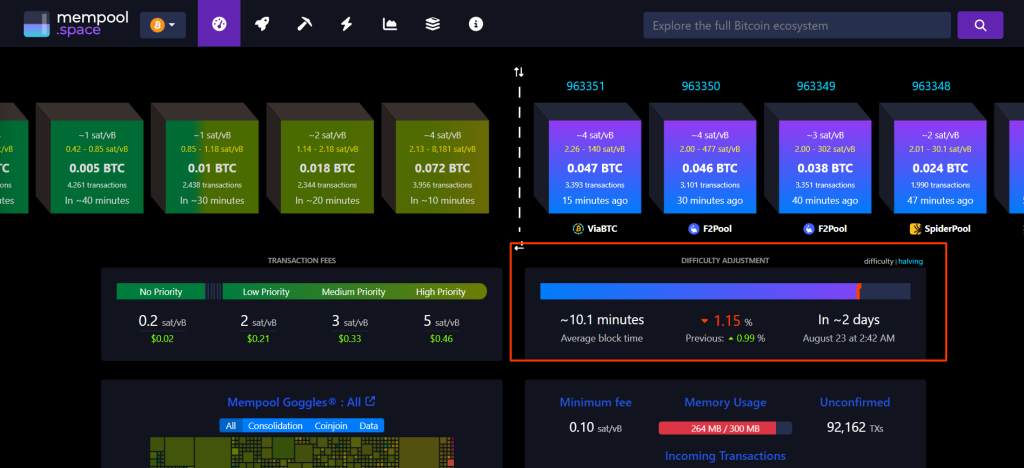
On the right is the difficulty adjustment. You’ll see a percentage, that’s how much harder or easier mining is about to get, and a countdown showing how many blocks are left until that change kicks in.
A positive percentage means more miners have joined and mining’s getting tougher, a negative one means the opposite. As a beginner, you don’t need to act on this one, it’s more just a fun stat that shows the network keeping itself in check.
The Explorer
That’s it, you’ve officially made it through a block explorer without a headache.
So go put that new skill to use. Check on a payment, snoop on an address, see how backed up the mempool is right now. We guarantee you’ll be entertained.